There are three options when creating an Investment Plan:
- Establish risk profile and select a Model Portfolio: Complete a risk tolerance questionnaire to establish the risk profile for the investment amount using 15 questions. Once completed, a risk profile will be given and only models that fit within the risk profile will be available for selection.
- Select Model Portfolio from your library: Create an Investment Plan quickly without use of a risk tolerance questionnaire. This option can be used if the risk profile is already known and the entire investment amount is to be invested in one model. All available models across all risk profiles will be displayed.
- Create a Custom Single or Multi-Account Portfolio: Create an Investment Plan without use of a risk tolerance questionnaire. This flexible option allows one account or even multiple accounts to be invested in multiple models. All available models across all risk profiles will be displayed.
This guide outlines how to create an Investment Plan using the Establish Risk Profile and Select a Model Portfolio type.
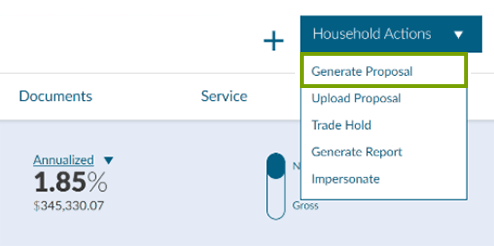
Step 1
Select the Household Actions dropdown on the top right corner of the platform and then select Generate Proposal.
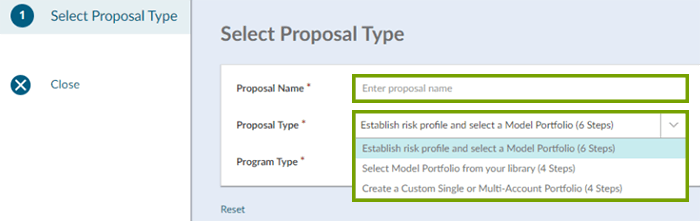
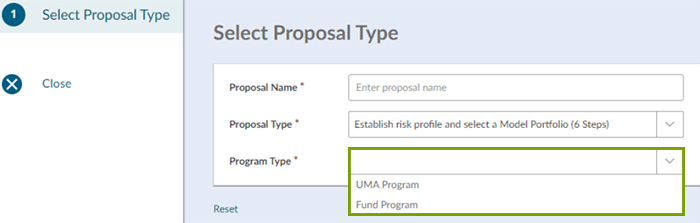
Step 2
Enter a Proposal Name, select the first Proposal Type: Establish risk profile and select a Model Portfolio (6 Steps). Choose a Program Type: UMA Program or Fund Program. Select Submit to continue.
Step 3
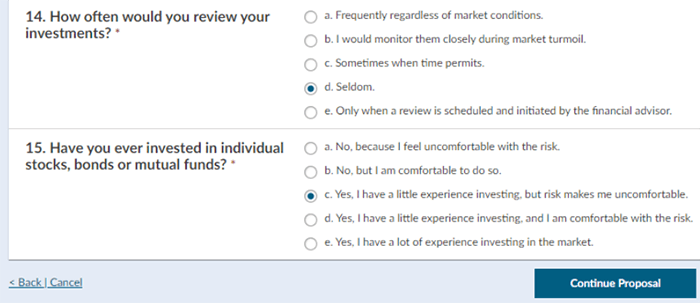
Complete the Risk Tolerance Questionnaire with the client and select Continue Proposal on the lower right side of the platform. If questions 1-15 are not completed, the Continue Proposal option will not be available to select. The Questionnaire is also available in fillable PDF format within the Resource Center to share with clients ahead of time.
Step 4
Select the appropriate Risk Profile and Asset Allocation based on the results of the Risk Tolerance Questionnaire. The Freedom Advisors platform allows you to deviate one level of risk from the Recommended Risk Profile based on the client’s risk score by selecting a risk profile that is either more conservative or more aggressive. Once decided, select the blue button (TAKE RECOMMENDED RISK, Take MORE Risk, or Take LESS Risk) to continue to the model selection.

Step 5
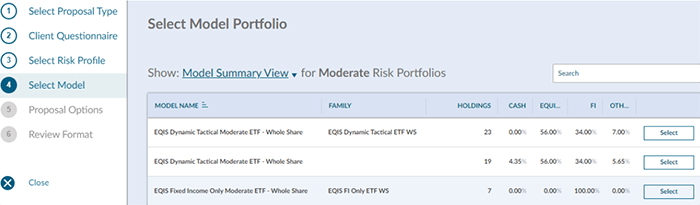
Select the appropriate model for the client. Displayed models will be determined by the risk selection and the available investment management offerings.
- Model Summary View: This will display the number of sleeves each model consists of along with the weightings by asset allocation.
Step 6
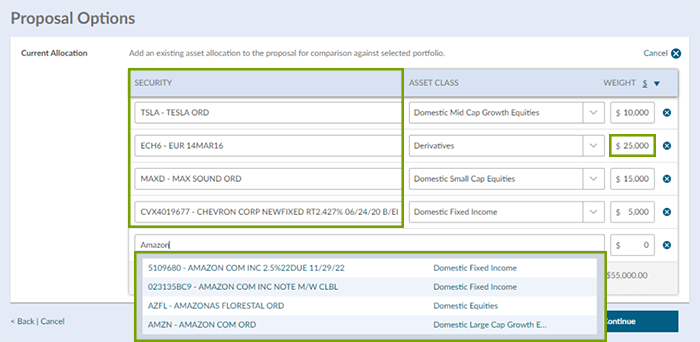
Proposal Options offers further customization of the investment plan proposal. You have the ability to add a Current Allocation to show a client’s current allocation for illustrative purposes. If no customizations are needed, this step may be skipped by selecting Continue at the bottom of the page.
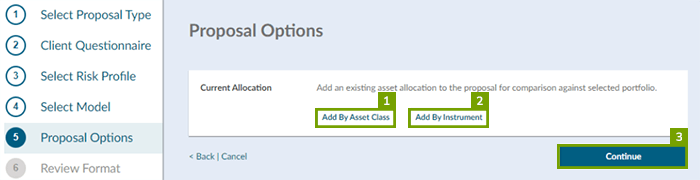
- Add Current Allocation: This enables you to input a client’s current portfolio to compare against the proposed portfolio. You can compare either by asset class or instrument. This allows the client to see how their current portfolio compared against the proposed portfolio.
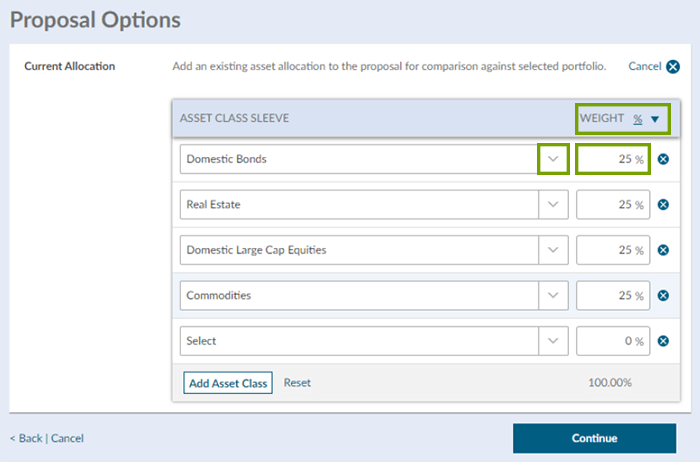
- To compare the client’s current portfolio by asset class, select the Add By Asset Class. Choose an asset class from the dropdown list then enter its weight. The weighting of the holding can either be entered using percentage (%) or dollar amount ($). Note: if weighting by percentage, total weight must equal 100% to proceed. Once the allocation has been entered, select Continue.
- To compare the client’s current portfolio by its instruments, select Add By Instrument. To search for a security, enter in the company’s name or ticker. Choose the security from the list shown then enter in the weight of the security. The weighting of the holding can either be entered using percentage (%) or dollar amount ($). Once the allocation has been entered, select Continue Proposal.
Step 7
The final stage of building the investment plan proposal is Review Proposal Format, which enables you to select the sections to be included within the proposal and to automatically save the final version of the proposal to the client’s document vault. Once these selections are made, click on Generate Proposal to produce the document.
- Include or Exclude Specific Proposal Sections: You have the ability to reduce the size of the proposal by unchecking any sections that are not required. Select the top check box next to Proposal Section to only include the required sections.
- Add Documents: This feature enables you to include outside documentation within the investment plan proposal by appending it to the end. Select ‘Add Document’ allows you to upload the additional document(s).
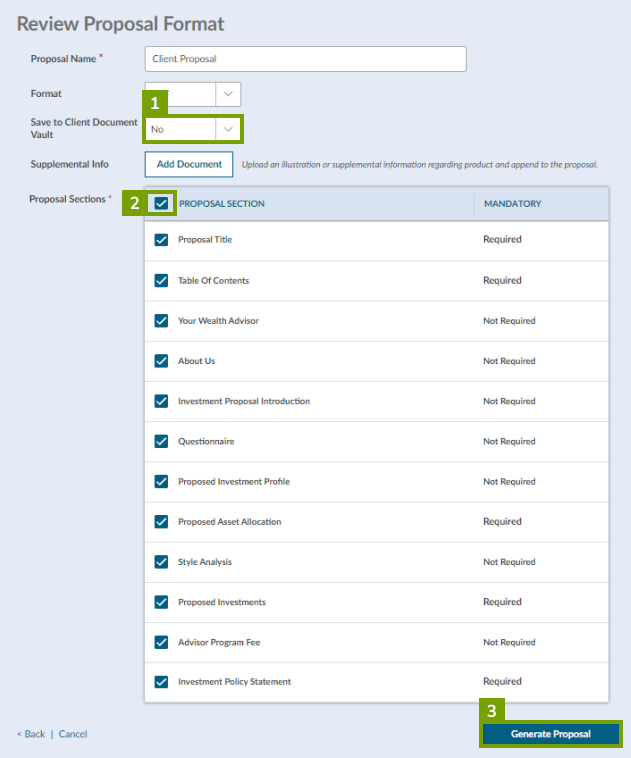
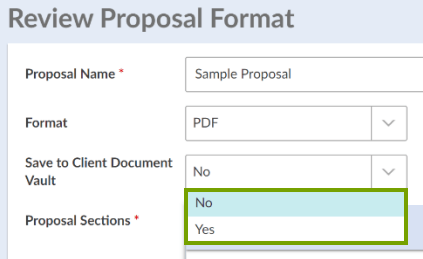
- Automatically Save to Client’s Document Vault: The advisor has the option to automatically save the investment plan proposal to the client’s document vault by selecting the drop down and selecting Yes.
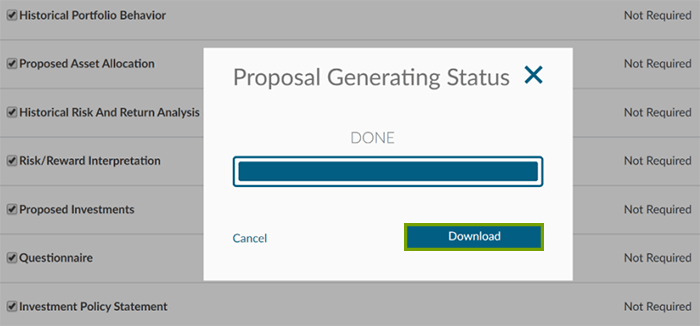
Step 8
Once the proposal has been generated, select Download.